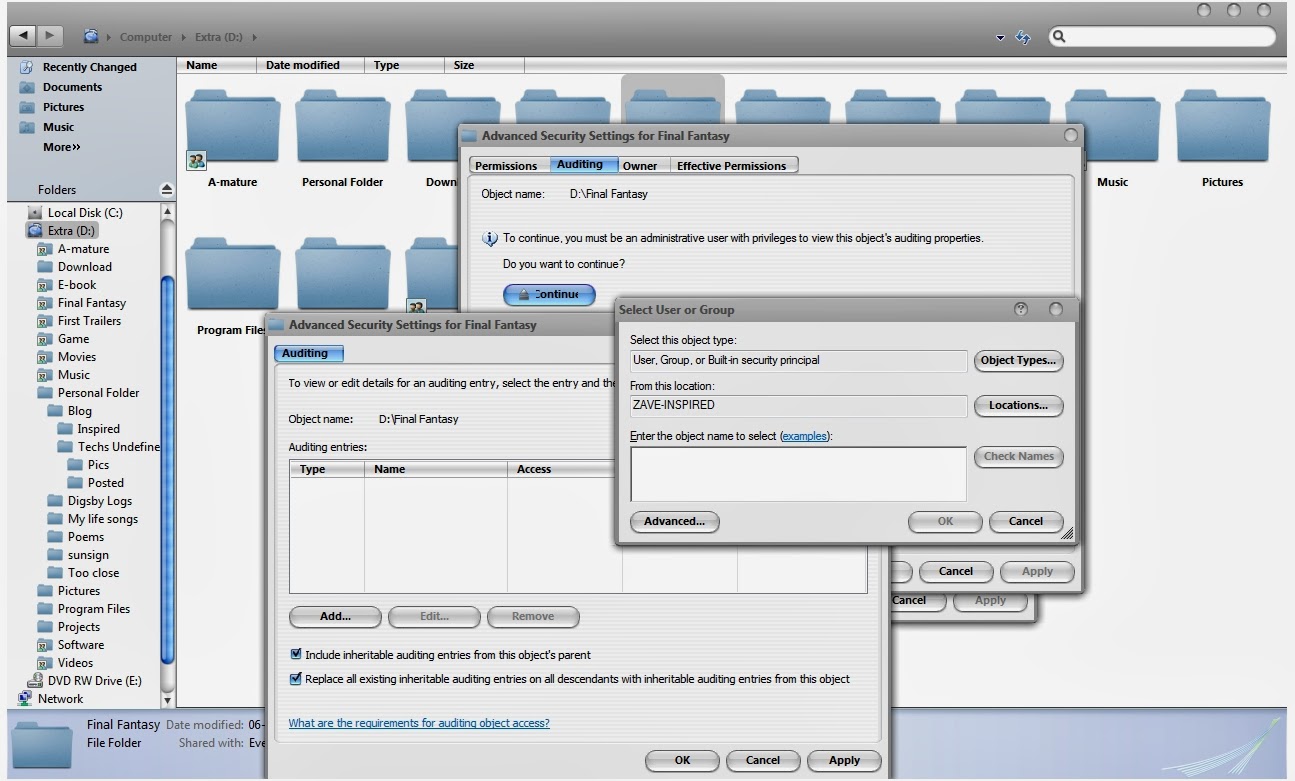
Hence I tried a few things to change the permission of the folder as a whole, rather than an individual file, which is much easier, but really tedious to do. So I describe the process which was of particular help.
Before doing all this, its better that you disable UAC. Though the process given below can be done with UAC enabled. But it is recommended to turn UAC off so that you don't have to bear the pain of typing in the administrator password again and again.
Follow the following steps:
- Right click on the folder you want to change the permission of.
- Click on properties.
- Click on Security tab.
- Click on the "Advanced" button at the bottom right corner. "Advanced security Settings" opens up.
- Click on the "Owner" tab.
- Enter the name of the user, or even better will be "Administrator".
- In case you cannot write in the space provided below "Current owner", Click on "Edit..." button.
- Click on "Other users or groups...".
- Now enter the user name, or "Administrator" in the space provided.
- Click "OK".
- Check the box which says, "Replace owner on sub-containers and objects".
- Click "Apply".
- Click "OK".
- Click "OK" again in the present window.
- You may be prompted with the message to continue, Click continue.
To do so follow the following steps:
- Right click on the folder.
- Click on properties.
- Click on Security tab.
- Click on the "Advanced" button at the bottom right corner. "Advanced security Settings" opens up.
- Click on the "Auditing" tab.
- Click on "Continue".
- Click on "Edit...". Another window opens up.
- Click on "Add..." and enter the user name or "Administrator".
- Click "OK".
- Now, check the box saying, "Replace all existing inheritable auditing entries on all descendants with inheritable auditing entries from the object".
- Click "Apply"->Click "OK".
- Click "OK" again, and select continue if any pop up for permission comes in.

You have successfully changed the rights of the folder as well as the sub folders. In case you want to remove the garbage entries from the "Group or user names", simply open the "Security tab" and select them and click "Edit...", followed by "Remove".
That is it.
Enjoy!


2 comments:
Thank you.
Glad that it was able to help you.
i visited your site , it's very nice...wellcome to my blog ! thank you so much!
http://www.tech24h.us/
Post a Comment