Install NetBeans:
- Download NetBeans from here according to your requirements.
- Install it by double clicking on the .exe file downloaded.
- Click on http://www.cygwin.com/setup.exe to download the setup file.
- Double click on the setup file downloaded.
- Click "Continue" in case confirmation appears.
- Click on "Next".
- The download has 3 options:
- --"Install from internet (downloaded files will be kept for future reuse)".
- --"Download without installing", simply downloads the files and you can install them later.
- --"Install from Local Directory", in case you have the supporting files.
- --Choose the appropriate option(recommended "Install from internet" assuming you have not downloaded the setup files) and click "next".
- The "Root Directory" specifies the folder where the cygwin is to be installed. It is set to, "C:\cygwin", but you can change it according to your convenience.
- Next it asks for "Local Package Directory", that is, where the files are to be stored. Choose any temporary folder.
- Choose the connection type.
- The package starts downloading.
- This produces a list of download sites, choose the nearest location to get the maximum speed of download.
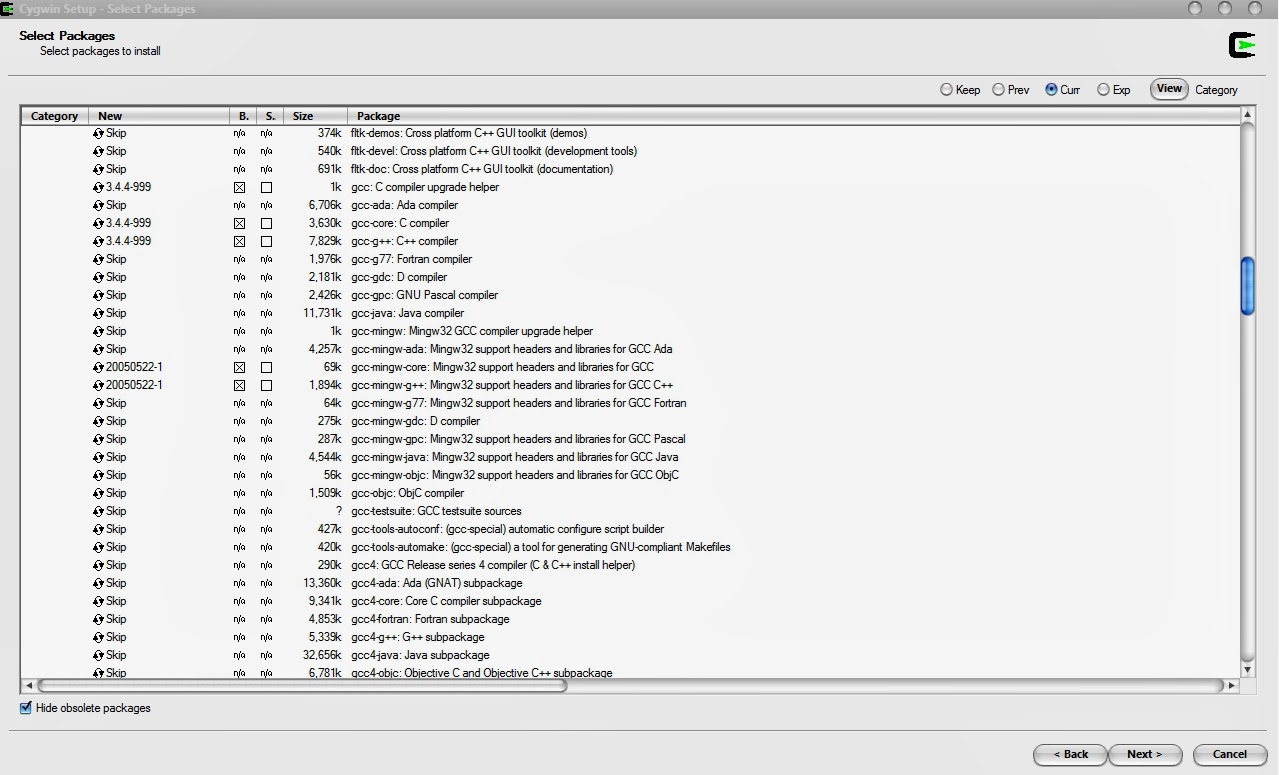
- Next you get a list of packages which you can install, don't install the entire package, since they are not required.
- According to NetBeans the following packages are to be installed:
- --gcc-core - C compiler.
- --gcc-g++ - C++ compiler.
- --gdb - The GNU Debugger.
- --make - the GNU version of the make utility.
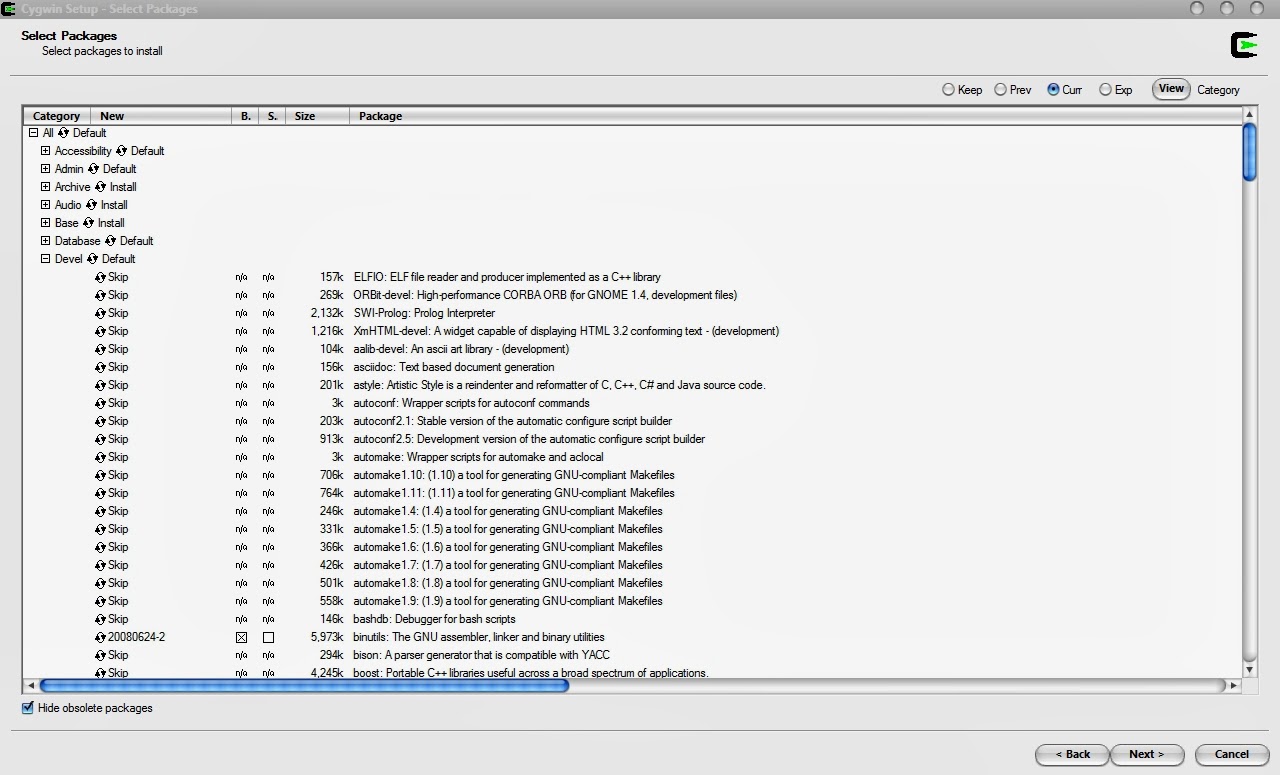
- To install click on the "refresh/default" button alongside the following packages:
- --The "base" package. This is to install the total base package.
- --In the "devel" package select only the following:
- ----binutils
- ----gcc core
- ----gcc mingw core
- ----gdb
- ----make
- ----mingw runtime
- If there are certain default packages selected for installation do not uncheck them.
- Click "Next". This will start downloading the packages.
- After the packages are downloaded, click "Next" to install them.


Setting the path for the compiler:
- Right click on "My Computer".
- Select "Properties".
- The select "Advanced System settings".
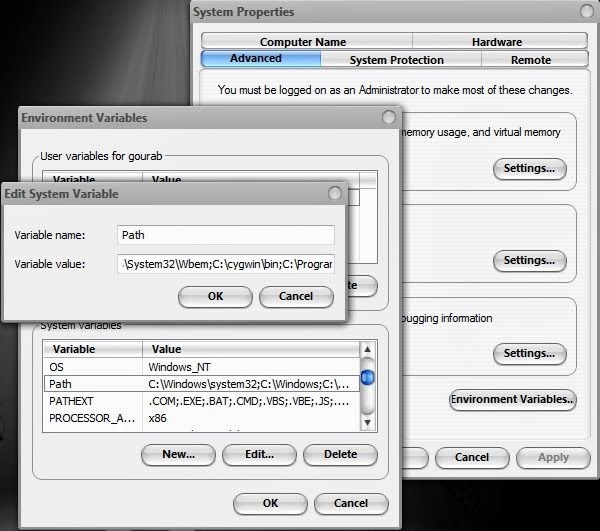
- Click on "Environment variables" at the bottom.
- Select "Path" and click "Edit".
- Add "C:\Cygwin\Bin”(or wherever you have located your Cygwin\bin folder) to the PATH variables list.
- Make sure to separate it from the last path with a ";".
- Click "Ok" and exit.

That is all.
NOTE:
The Cygwin gcc compiler installed can be used with any other IDEs or such other software which support manual addition of C/C++ compilers.
Enjoy!


0 comments:
Post a Comment